


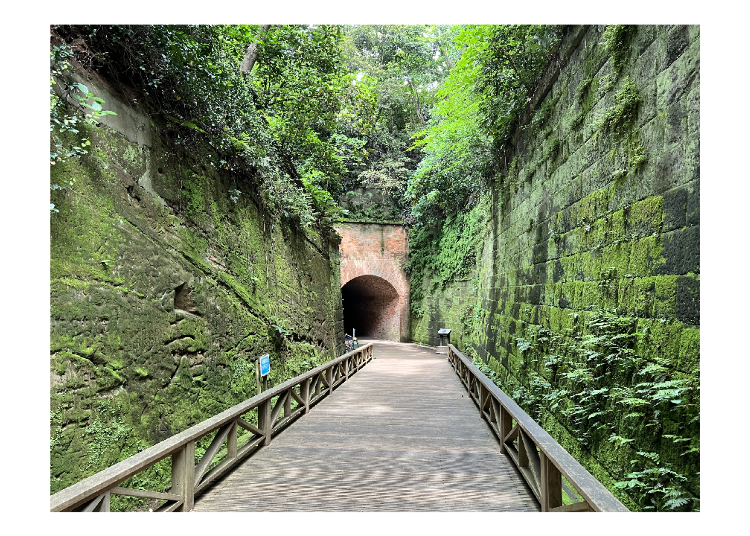
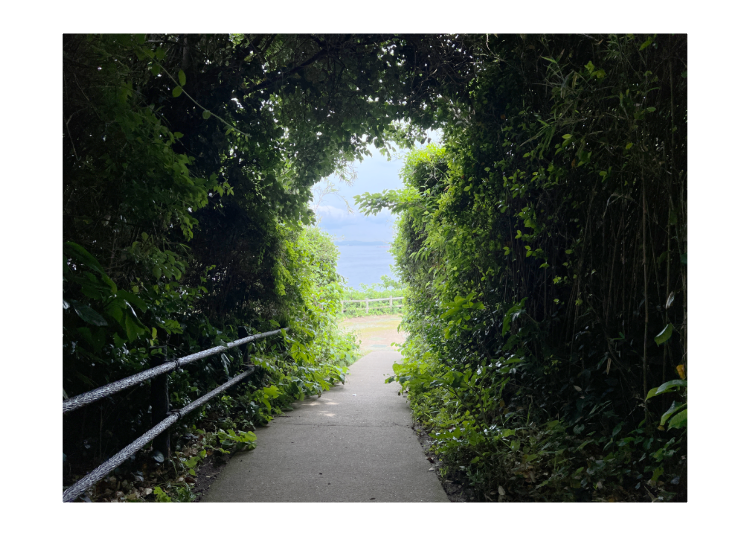
Sarushima is the only uninhabited island in Tokyo Bay. The beautiful natural island is perhaps best known for this sight: A long wooden pathway wedged between brick walls that are covered with moss and tall trees stretching toward the sky. At the end of the path is a dark and mysterious-looking tunnel tucked surreptitiously away in the island's luxuriant forest.
While the scene is certainly photogenic enough for social media likes - and that's what many people go there for - you can also consider visiting the island simply to enjoy the sights of a bygone world and experience walking through historic buildings and artifacts that had been built for wartime use.
As exotic as the idea of exploring ruins surrounded by dense shrubbery sounds, the island is surprisingly accessible, being located quite near the bay coast. Taking a day trip here from Tokyo or Yokohama is very doable and highly recommended!
Does this island live up to its rumored mystique? This LIVE JAPAN writer from Taiwan scouted the place out and brought back stories, photo spots, transportation methods, and other things of note for all you readers interested in taking a look on your next visit to the area!
Where and what is Sarushima?
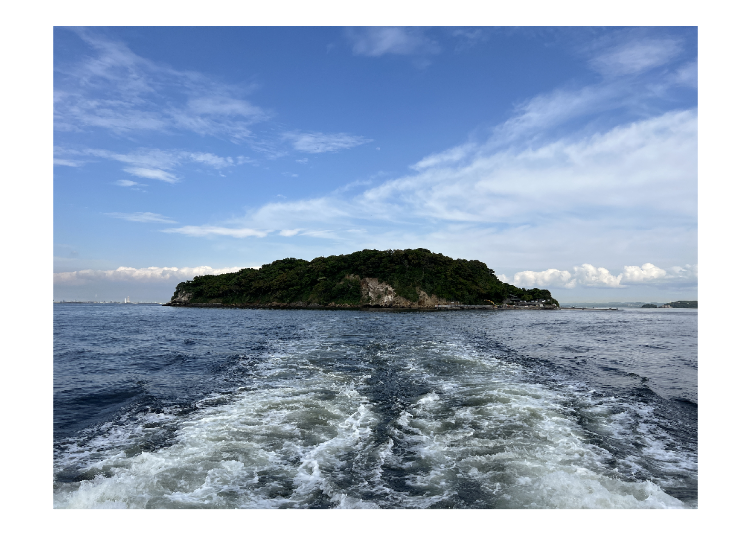
As mentioned at the outset, Sarushima - which literally means "Monkey Island" - is a 0.055 square kilometers (0.021 square miles) natural island located off the coast of Tokyo Bay in Kanagawa's Yokosuka City. That's about the size of 10 and a half American football fields, which is pretty tiny as far as islands go!
Don't be fooled by its diminutive size, though. Sarushima is chock-full of delights to be discovered. After basking in the sights and sounds of the island's trademark ruins, relax and enjoy a bite in one of the island's eateries or grill up a storm in a BBQ pit (reservation required for rental equipment if you don't want to lug yours around!).
And don't forget about the Sarushima guided adventure tour! Here's a small bit of trivia: There are, in fact, no monkeys on Monkey Island. Sarushima's name came from an old legend that speaks of a large white monkey that guided a monk to a safe shelter after his ship drifted ashore on the island in a storm.
How to go to Sarushima

Find your way to Yokosuka Chuo Station on the Keikyu Line and walk for about 15 minutes from the station to Mikasa Terminal. Once there, purchase a ticket to the ferry that will take you to the island (no reservation required).
I had to wake up bright and early to hop on a train that would allow me to catch the weekday 10:30 a.m. ferry, but it was worth the effort!
The morning train was unsurprisingly packed, but fewer people were waiting for the ferry on my chosen day and time of visit.
Immediately after getting off the train, I hurried to the ferry ticket counter and was able to obtain one without hassle. This meant I could hop on the ferry early to scope out the perfect picture-taking spot onboard!
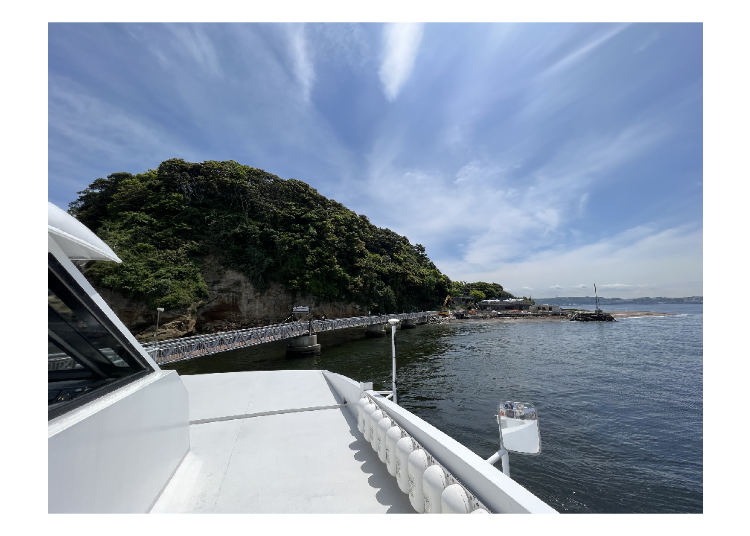
The ride takes about 10 minutes each way, and the ferry to the island runs on an hourly schedule from 9:30 a.m. onwards.
As for the ride back, it follows an hourly schedule from 9:45 a.m. There is an additional ride in summer compared to winter.
The ferry consists of a hold and front deck on the first floor and a second-floor deck. Because the journey is very short, coming out to the deck for pictures if you can't find a seat will be quite a unique experience as well. On the day I visited, I was accompanied by clear skies and a refreshing breeze. The ripples the ferry made in the sea sparkled like dancing gems under the rays of the sun, building up anticipation for the adventure that awaited on the fast-approaching island!
Ticket price:
Adults: 500 yen (Sarushima entry) + 1,500 yen (round trip ferry) = 2,000 yen
13 to 16: 250 yen (Sarushima entry) + 1,500 yen (round trip ferry) = 1,750 yen
12 and below: 250 yen (Sarushima entry) + 750 yen (round trip ferry) = 1,000 yen
* All prices include tax
Summer season (March 1 — October 31)
・Departure: One trip every hour from 9:30 a.m., last trip at 4:30 p.m.
・Return: One trip every hour from 9:45 a.m., last trip at 5:00 p.m.
Winter season (November 1 — February 28)
・Departure: One trip every hour from 9:30 a.m., last trip at 3:30 p.m.
・Return: One trip every hour from 9:45 a.m., last trip at 4:00 p.m.
Best things to do on Sarushima?
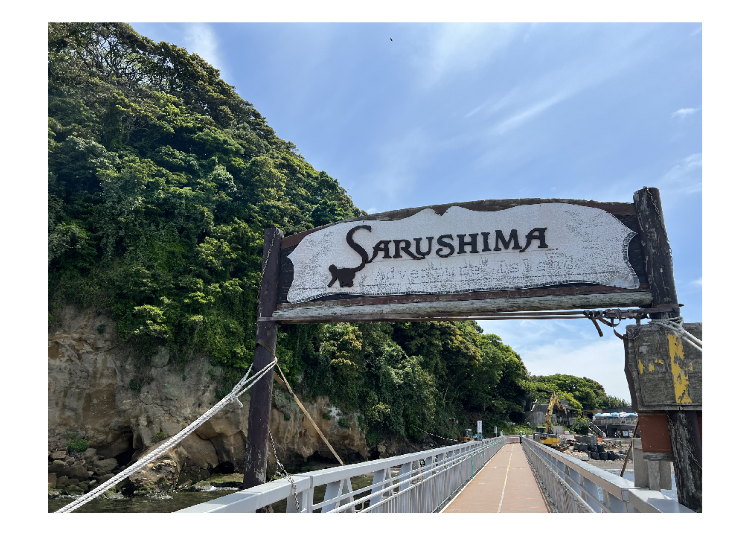
Having already done my research on the island beforehand, you bet I've been looking forward to enjoying the calm and quiet of the island along with its scenic views. The first thing to greet you upon disembarking is the pier with a signboard bearing the name of the island, "SARUSHIMA."
Since I visited during May, the weather was pleasantly cool, making it a perfect day to wander around on foot at leisure. As you make your way down the pier, you'll notice a flight of stairs on the left that leads to the Sarushima Welcome Center, a building with outdoor seating that's staffed by knowledgeable guides.
If you understand Japanese, I highly recommend the Sarushima adventure tour, which is a guided tour that allows you to get to know more about the history and stories behind Sarushima and its wartime relics. I signed up for it immediately upon arrival!
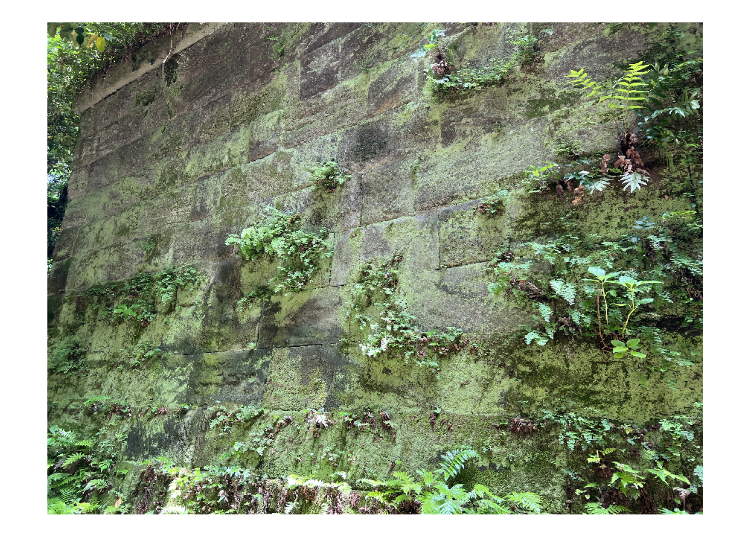
Sarushima Must-See Spot 1: Brick Wall Path

Here's the scene that captivated me the most: A long, narrow wooden pathway flanked on both sides by mossy old brick walls also home to an abundance of lush foliage.
As you walk down the path to the cries of various avian life flying overhead, you can't help but feel like you've just taken a 10-minute ferry ride to a different world altogether.
A world that refreshes the soul and smooths those pesky worries away. Since I took the second scheduled ferry to the island, there were not many visitors on the island and even less on the guided tour, which allowed me to really focus on the guide's explanations of the surroundings.
It's mind-boggling to consider that there's such a rustic environment to be enjoyed merely 10 minutes away from Yokosuka City!

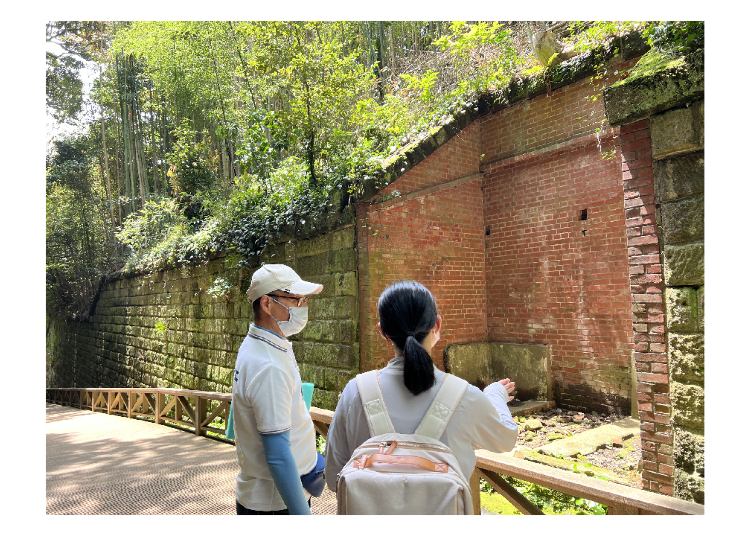
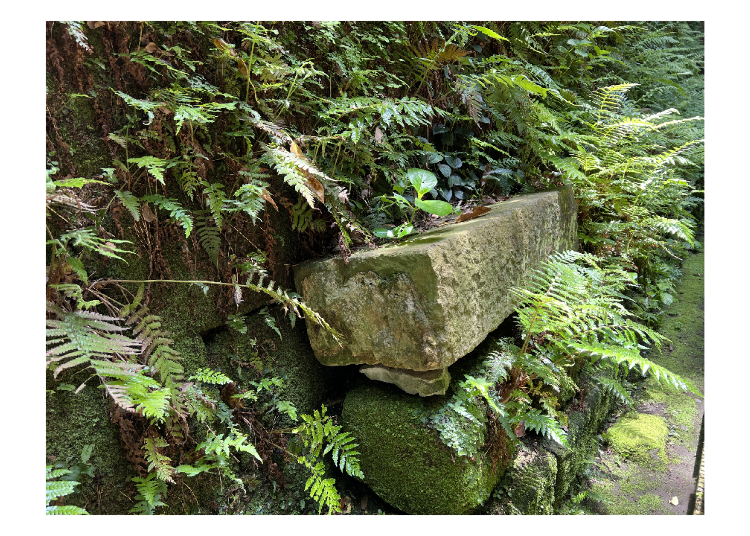
The groove in the stone wall here left a deep impression on me.
Sarushima has existed since the Jomon period thousands of years ago (14,000 — 300 BCE), but the most iconic sights on the island now are preserved buildings constructed during the Meiji (1868 — 1912 CE) and Showa (1926 — 89 CE) era.
Sarushima was used as a defensive fortification during the Second World War and had the mission of obstructing and intimidating enemy fleets trying to enter Tokyo Bay. Many soldiers were stationed here during that period of time, and war-related facilities such as artillery points and gunpowder magazines were built as a result.
So what's so interesting about this groove in the stone wall? Well, it used to be a latrine! And why did this ordinary latrine leave such a deep impression on me? According to the guide, only male soldiers were sent to the island, so the latrines here had a very simple design: a roof (which no longer exists), a few recesses for shared use, and no doors.
From the lens of modern man, this is quite a scandalous take on the toilet space, but when you think about the sense of urgency they needed to live with during wartime, it all starts making more sense.
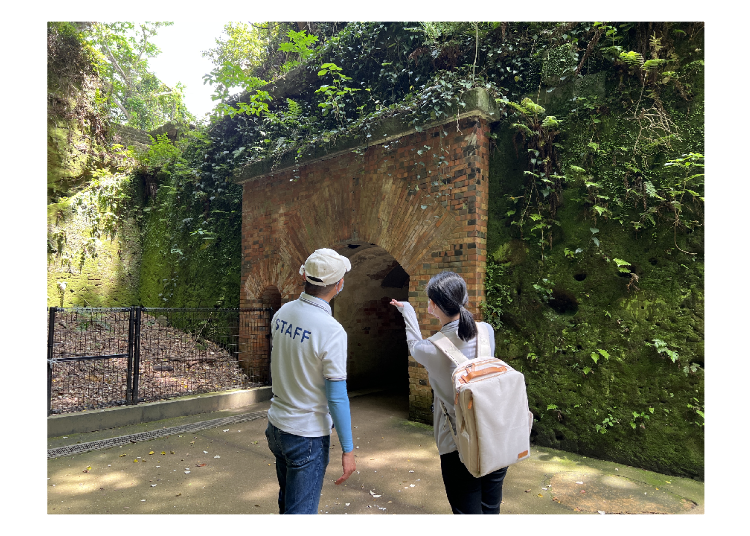
Sarushima Must-See Spot 2: The Tunnel
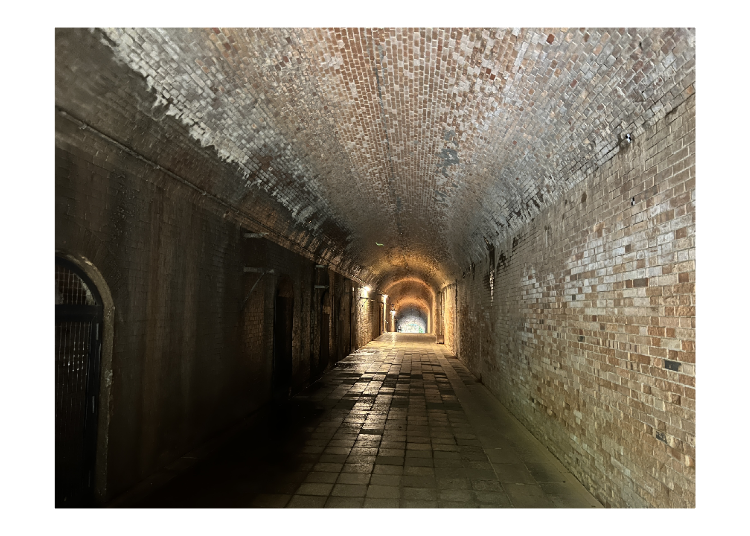
At the end of the wooden path, you'll find yourself standing at the entrance of what is known as the Tunnel of Love - so named because this dimly lit tunnel has caused quite a few nervous couples to hold hands spontaneously while navigating themselves to the exit together.
Too bad I'm not afraid of the dark, which means I didn't need to grab anyone's hand to make it through. Nice try, though, tunnel!
This tunnel did not, of course, start out as a couple's sightseeing spot. You may notice a few inaccessible rooms by the sides as you walk along. These were used to store ammunition during the war, and they stand as a sobering reminder of the tunnel's origin.
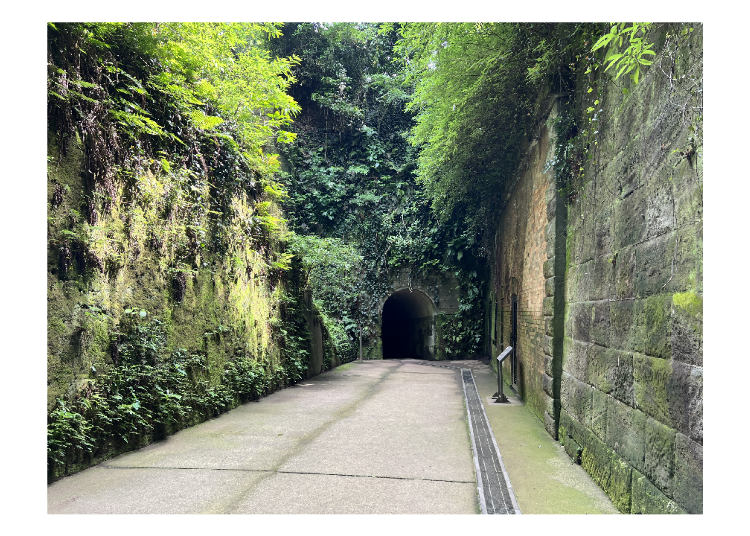
This isn't the only tunnel here either. As a former defensive fortification, many other pathways were built to facilitate travel around the island. Don't forget to look around while you follow the guided tour to see if you can find any. Aren't you curious about that foliage-covered dark tunnel entrance at the end of this path and where it leads to?
Sarushima Must-See Spot 3: Battery Relics
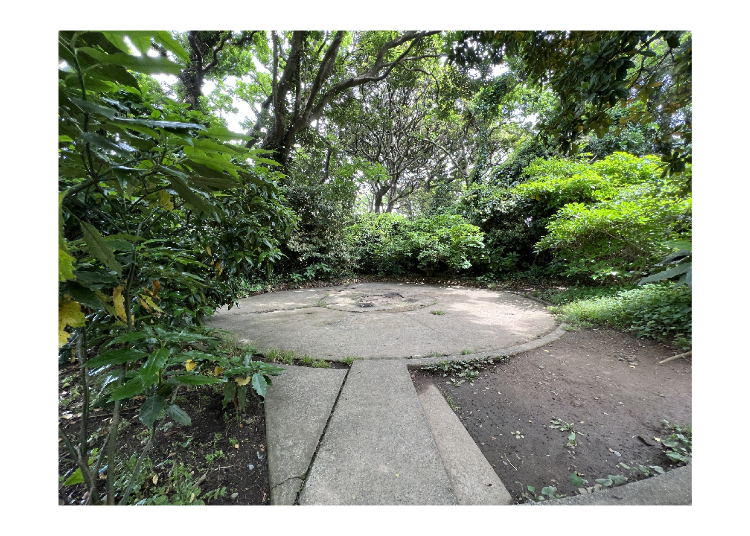
You'll soon discover there are plenty of round-shaped relics around Sarushima. These were platforms for mounting artillery. The interesting thing about these platforms was that they never really saw active use in the war, even though the history of Sarushima included periods that covered both naval and aerial battles.
In fact, there are batteries designed for both anti-ship artillery and anti-aircraft artillery on the island, but the construction of these could not be completed on time, and the range of this artillery was shorter than fighter planes, so it could be said that these batteries retired before they ever saw any action.
Although all artillery have already been dismantled and removed from the island, these round platforms surrounded by encroaching greenery stand as a stark testimony to the passage of time.
Taking the Perfect Picture 1: The unique combination of relics and foliage
Don't forget to slow down once in a while on your way to the must-see spots mentioned above to take closer pictures of the surrounding walls and scattered bricks and document how nature has taken over throughout the years.
I asked the guide what the best time to take pictures on the island was, and the guide revealed that photos of the brick wall path would look best at noontime on clear days.
The bright sunlight would cast dark shadows of surrounding trees on the pathway in perfect proportion! Don't be too bummed if the rain clouds start hovering during your visit, though.
From what I can see, the relics will likely exude a different sort of mood altogether on gloomy days in the reflection of rain puddles. So really, any day is a good day to visit Sarushima for great pictures!
Taking the Perfect Picture 2: The Brick Style Counts?!
Something else you can note when taking pictures of the pathway and tunnel is how the bricks have been laid out on the walls. The guide informed us that there were two different bricklaying bonds used for the buildings on Sarushima: English and French.
The French bond was used during the initial stage. This is an elegant style of bricklaying where every course consists of one long brick and two short bricks. Later, the buildings were constructed using the more robust English bond so that they could better handle natural disasters that threatened the island's safety.
Another interesting thing to note is the sight of bricks with different shades of colors in the tunnel, making the walls look quite artistic. The guide explained to us with a chuckle that these were actually defective bricks that somehow became an accidental masterpiece from a modern art point of view. Beauty is in the eye of the beholder, after all!
Taking the Perfect Picture 3: Playing with Light and Shadow
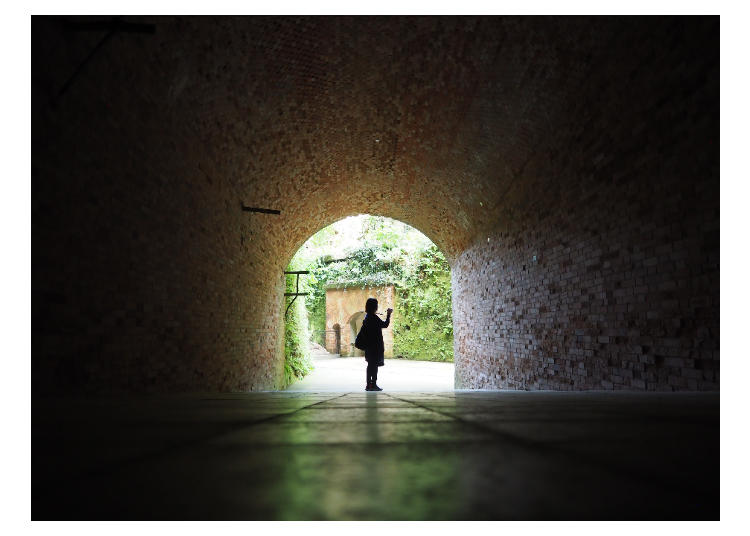
Take a look at this photograph of the Tunnel of Love. The subject is someone standing at the entrance, where the only light source is situated. Because the picture was taken from inside the dark tunnel, it resulted in a silhouette with a strong contrast between light and shadow.
Whatever your plan for pictures, don't forget there are other people around as well, and be sure to finish your photo taking quickly so that others can have a chance to grab their perfect shot too!
Greenery thrives on Sarushima, and foliage is generally thick, so there are plenty of opportunities for you to find a good nature shot as well, especially in combination with the beautiful blue sea in the background.
Be warned, though, that due to the pristine condition of nature on Sarushima, you're bound to encounter bugs once in a while, so do take the proper precautions if you're not a fan of them! Also, if you're aiming for the most sublime shots possible, try to set off as early as possible to avoid having to jostle with huge crowds for prime photo real estate.
-
Sarushima Park猿島公園
-
Address
Sarushima, Yokosuka City, Kanagawa Prefecture 238-0019
View Map -
Nearest Station
Yokosuka Chuo Station (about 56 minutes by train from Shinagawa Station on the Keikyu Line). Walk for about 15 minutes from the station to Mikasa Terminal / Sarushima Visitor Center. The ferry ride to Sarushima will take about 10 minutes.
・Multilingual support:
Sarushima Adventure Guided Tour - Japanese language only -
Address
Sarushima, Yokosuka City, Kanagawa Prefecture 238-0019
Time to spare after visiting Sarushima? Drop by the MIKASA Historic Memorial Warship!
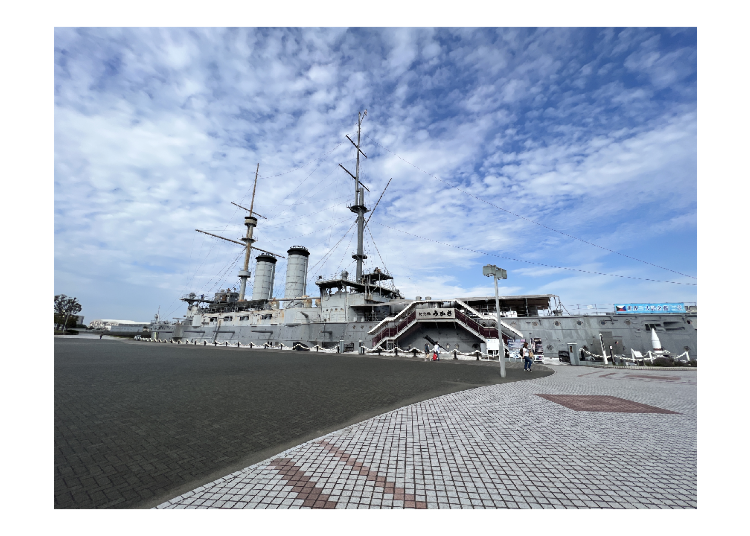
If you still have time and energy left after your Sarushima tour, definitely pay a visit to the nearby MIKASA Historic Memorial Warship. Although not related to the history of Sarushima, the decommissioned battleship is also an interesting artifact from wartime that has been preserved as a museum ship.
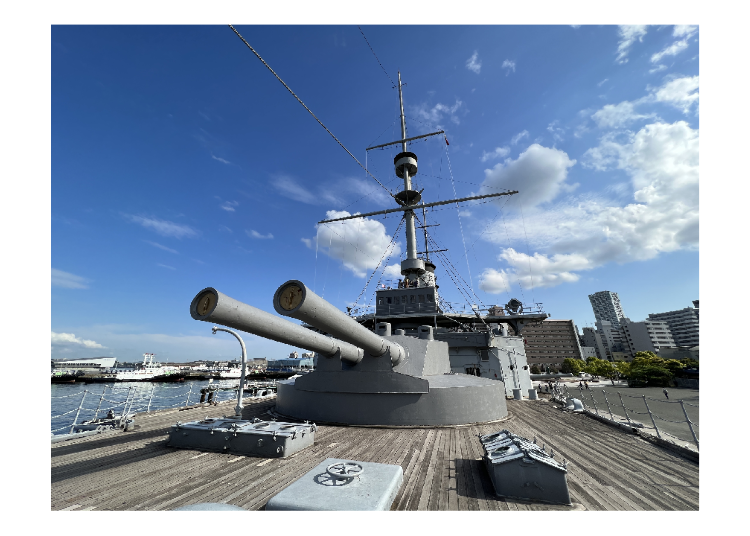
See and feel what a morse code machine is like, try operating the cannons, and enjoy some VR films of naval battles in this historical museum ship!
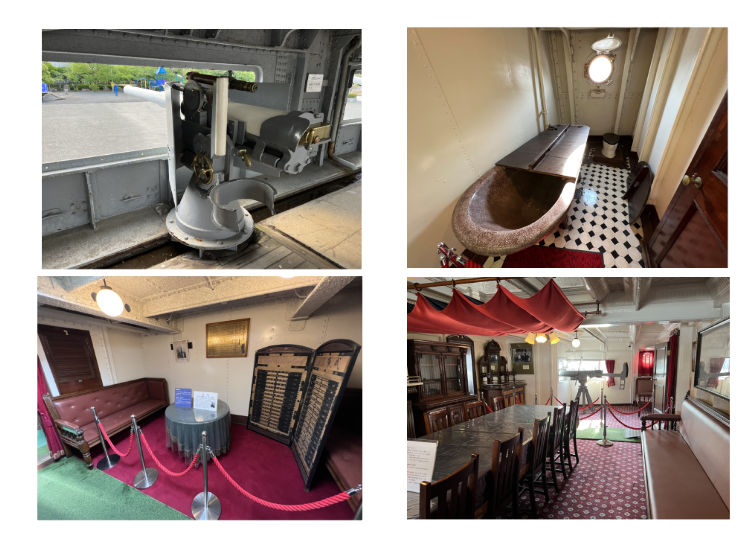
To me, the most interesting part of the museum is not the formidable sight of a well-preserved battleship but the chance to walk into the hold of a wartime ship to see the bedrooms, kitchens, toilets, and other facilities that officers of the past used during their service and consider what life must have been like for them then.
You can also see Sarushima from the ship's upper deck, and it's a sight to behold from this particular angle too!
-


-
Address
82-19 Inaoka-cho, Yokosuka City, Kanagawa Prefecture, 238-0003
View Map -
Nearest Station
Yokosuka-Chuo Station (Keikyu Main Line)
- Phone Number 046-822-5225
-
Address
82-19 Inaoka-cho, Yokosuka City, Kanagawa Prefecture, 238-0003
Can't wait to go back to Sarushima again!
My visit to Sarushima happened in May when trees had just past their spring renewal and were growing verdantly. The contrast between nature's vibrant new growth and the gloomy grey of the past really sticks around in the mind for a long time.
Stand around and admire the scenery long enough for the crowds to scatter, and you'll find yourself alone with your thoughts (and the occasional chirping of nearby bugs) in a historic place that has seen the ravages of time but continue to stand tall. Don't be surprised if you find yourself nostalgically remembering a forgotten memory or two, or wondering what life was like in the past during the war.
Whatever the case, I think I'll be back to bask in the ephemeral atmosphere of the island again with my family and friends very soon, and you should definitely consider doing so too!


- Area
- Category
*Prices and options mentioned are subject to change.
*Unless stated otherwise, all prices include tax.
Popular Tours & Activities
Recommended places for you
-

Tokyo Tower
Landmarks
Roppongi
-

Kappabashi Street
Old Towns (Shitamachi)
Asakusa
-

Ueno Zoo (Ueno Zoological Gardens)
Zoos, Aquariums & Botanical Gardens
Ueno
-

Tokyo Disney Sea®
Theme Parks
Chiba Suburbs
-

The Imperial Palace
Other Architecture
Tokyo Station
-
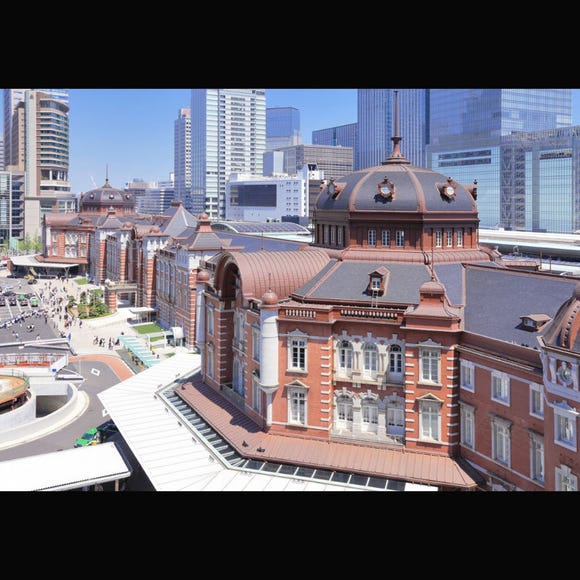
The Tokyo Station Marunouchi Building
Landmarks
Tokyo Station
-

(Hidden Gem in Ibaraki) Ocean-View Torii, Hydrangeas & a Lucky Turtle! A Perfect Day Trip to Sakatsura Isozaki Shrine
by: Alice Lee
-

Stay Connected at the Summit! "Fujisan Wi-Fi" & Latest 5G SA for a Safe and Comfortable Climb
by: Guest Contributor
-

Welcome to Tokyo! Explore the New "Kiki & Lala Monorail" and Sightseeing Spots Along the Tokyo Panorama Line
by: Guest Contributor
-

Tokyo Tower's Milky Way Illumination 2026 Returns! See 30,000 Lights Transform Tokyo's Skyline This Summer
by: Guest Contributor
-

July Events in Kanto: Fun Festivals, Food, and Things to Do
-
Ad

Stay on time with the power of light. Celebrate 50 years of history with the Limited Edition CITIZEN Eco-Drive and other must-have models
Inspiration for Accommodations
-

Family-Friendly Hotels with Free Shuttle to Disneyland: Convenient Access for a Magical Stay
-
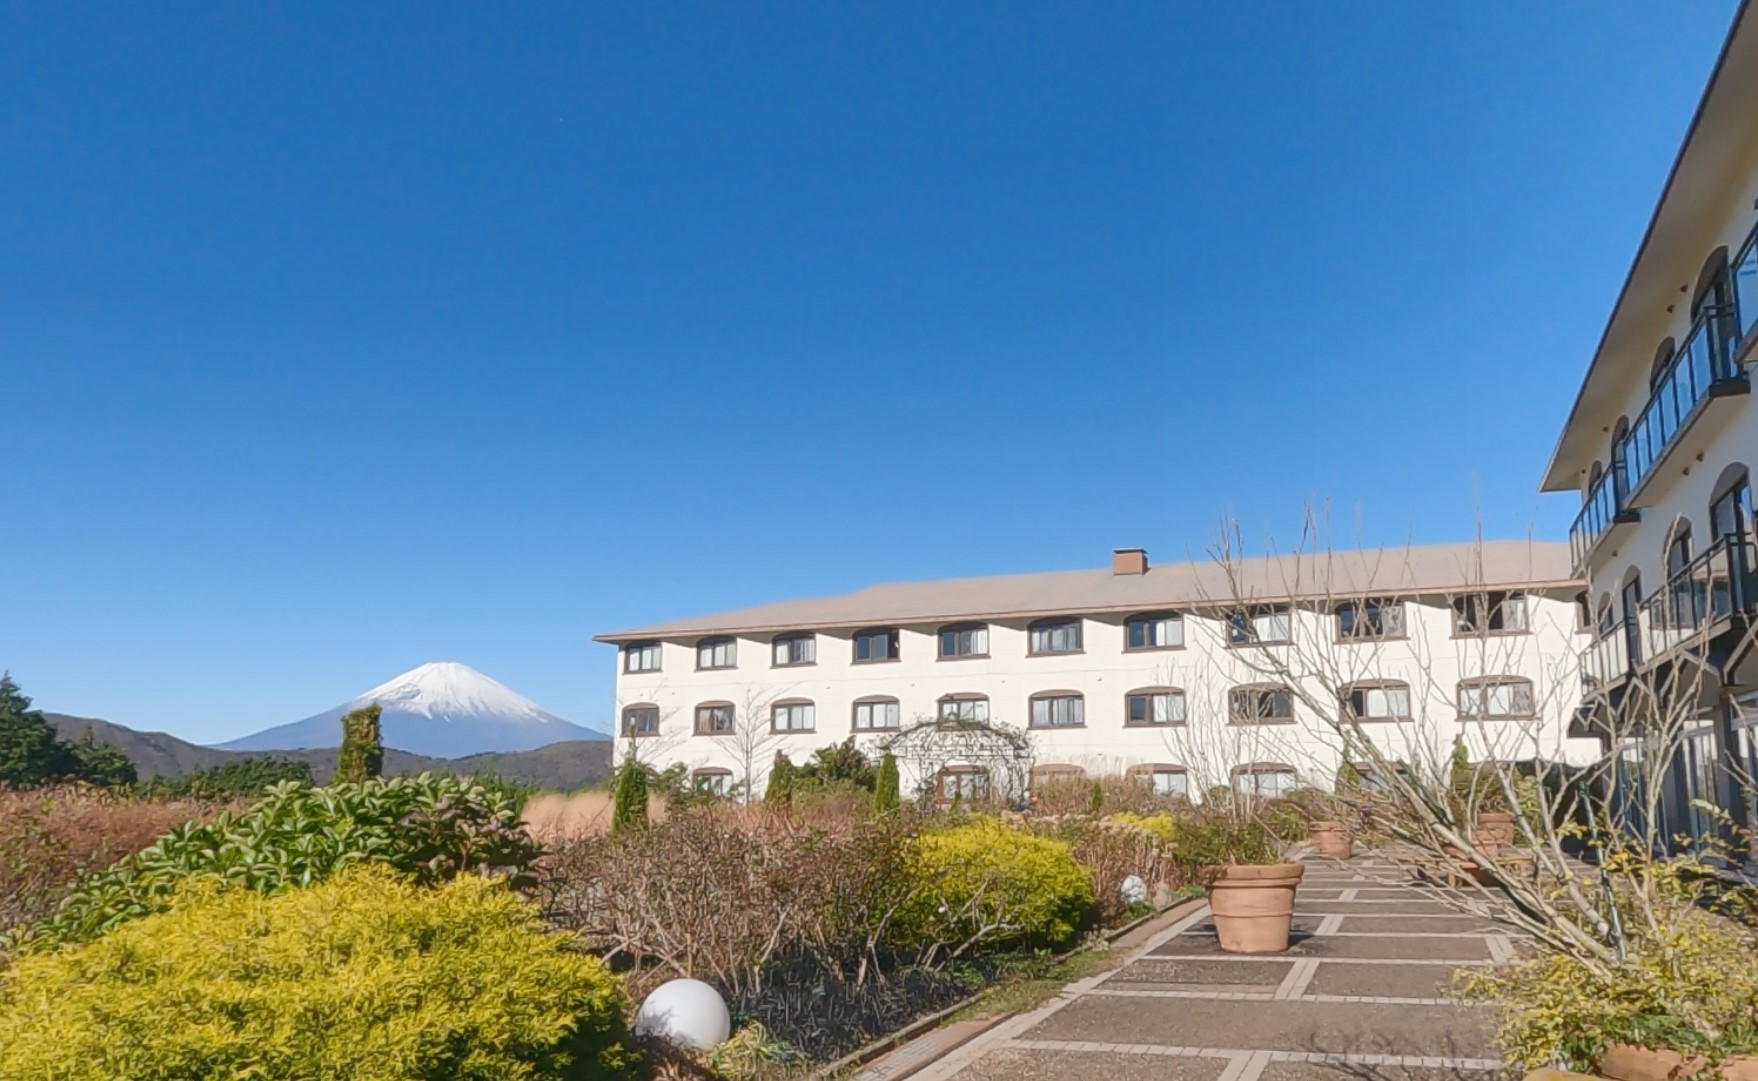
Top Ranked Hakone Hotels with Mt. Fuji View: Enjoy Stunning Scenery from Your Private Space
-
Convenient Tokyo Hotels with Airport Shuttle: Ideal for Families and Heavy Luggage
-

9 Family-Friendly Hotels with Comfortable Family Rooms in Asakusa
-
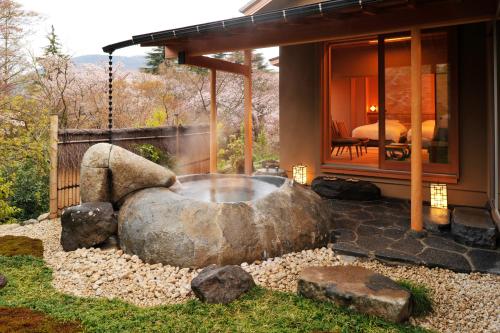
10 Open-air bath Onsen Ryokans in Hakone for Ultimate Relaxation
-

6 Surprisingly Cheap Things in Japan
-

Complete Guide to Buying Japanese Medicine in Japan: Phrases and Vocabulary You Need to Know
-

The Best of Japan: 11 Major Cities Every Traveler Should Visit
-

Tokyo Tsukiji|Tsukiji Area Map & Sightseeing Information
-

Exploring Tokyo: 4 Must-Visit Spots around Tokyo Station
-

Enjoy breathtaking views, pristine beaches in Mitoyo, Kagawa Prefecture
- #best ramen tokyo
- #what to buy in ameyoko
- #what to bring to japan
- #new years in tokyo
- #best izakaya shinjuku
- #things to do tokyo
- #japanese nail trends
- #what to do in odaiba
- #onsen tattoo friendly tokyo
- #daiso
- #best sushi ginza
- #japanese convenience store snacks
- #best yakiniku shibuya
- #japanese fashion culture
- #best japanese soft drinks